
The custom fields feature in WordPress allows users to customize the metadata that is captured on individual posts and pages.
Ultimately, the specific metadata that is displayed on your site by default is entirely dependent on your selected theme. For example, the GeneratePress theme Mike and I use displays the post date, author, category, and tag.
As it turns out these four metadata types are universally captured by the vast majority of themes.
What’s nice is most themes allow you to select which of these four types you’d like to have shown. As highlighted below, we currently prefer to only have the date and author visible.
The beauty of WordPress custom fields is they enable you to go beyond the default metadata types dictated by your theme and display anything you’d like.
Despite their usefulness, WordPress developers decided to make custom fields an “additional feature” in a recent software version release. As a result, they no longer appear by default and instead need to be manually enabled, causing quite a bit of confusion.
Users who discover their WordPress custom fields not showing can re-enable them by first navigating to the page or post edit view. From here select Options > Preferences > Panels. Finally, beneath the “Additional” section, turn on the toggle button next to “Custom fields” and click Enable & Reload.
Alternatively, if you desire greater flexibility and functionality beyond what WordPress offers, you can also consider installing a dedicated custom field plugin.
Let’s dive into both approaches in greater detail.
Adjust WordPress Page & Post Panel Preferences
As mentioned, the custom fields section at the bottom of the edit view in a page or post no longer populates by default.
Fortunately there is an option that allows you to manually re-enable the fields so that they reappear.
IMPORTANT NOTE: Before completing the steps below, be sure to save any open drafts you are working on. The final step requires you to reload WordPress and you risk losing any unsaved work!
- First, enter the edit view of a page or post.
- Then select Options (vertical ellipsis symbol) in the top right corner of the screen, followed by Preferences.
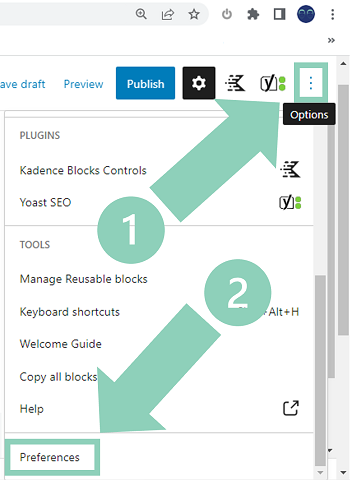
- Within Preferences, select Panels from the submenu on the left.
- Finally, under the Additional subheading, use the toggle button to enable Custom fields and click Enable and Reload.
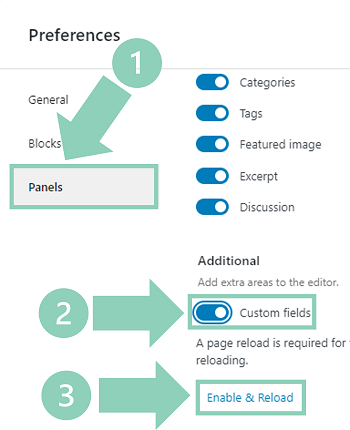
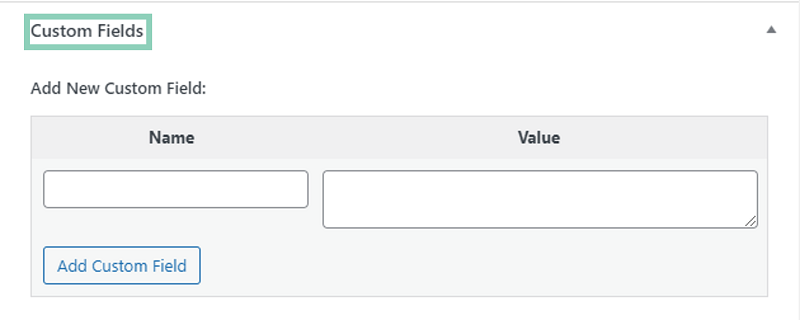
Once the page or post has been reloaded, scroll down to the bottom of the edit view. You should now see the custom fields box appear.
Activate Advanced Custom Fields Plugin
While custom fields are native to WordPress, some users prefer to use the Advanced Custom Fields (ACF) plugin instead.
Ultimately, the ACF plugin has a more user friendly interface than the native feature. ACF also allows for field appearance customization and offers greater flexibility in terms of which fields are visible on your live site.
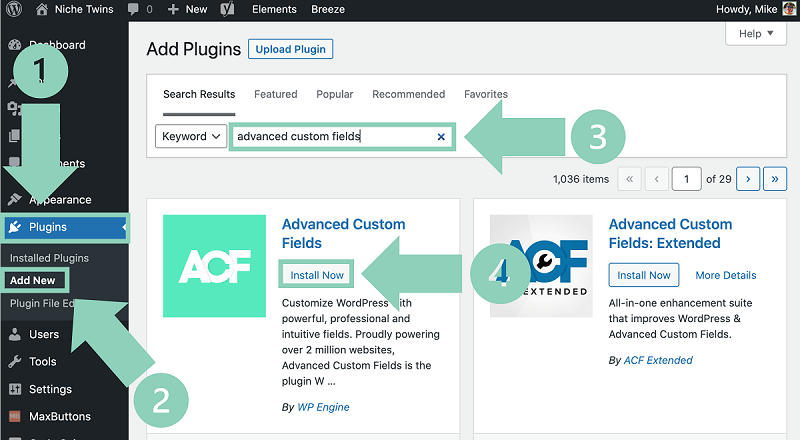
To deploy the ACF plugin, select Plugin and then Add New. Then search for “Advanced Custom Fields” and select Install Now, followed by Activate.
Once the plugin is activated, a new menu WordPress menu item called “Custom Fields” will appear in the dashboard.
You are now ready to start experimenting!
Final Word
In a recent WordPress software version release, developers reclassified custom fields as an ‘additional’ feature. As a result, these fields no longer appear by default.
If your native custom fields in WordPress are not showing, you can re-enable them within the page of post edit view by selecting Options > Preferences > Panels and turning Custom Fields back on.
For folks who desire greater flexibility with their custom fields and an improved user experience, the Advanced Custom Fields plugin is a great alternative!