
Great site owners know that every square inch of their website presents an opportunity to further highlight their brand.
And when it comes to effective branding, few things are as important as color scheme.
That’s why it’s worth taking the time to change the color of even seemingly trivial elements like your WordPress navigation menu.
Having a menu with a color scheme that aligns with your brand and logo shows attention to detail. Added up, all these little details contribute to your readers’ “first impression” of your site.
In short, it matters.
Ultimately, depending on the theme you have chosen and your comfort level with custom code, there are a few different routes you can take.
To change the menu color in WordPress, first check your theme editor capabilities by navigating to Colors > Primary Navigation. If the customizer options are limited, consider deploying custom CSS instead. Finally, for single menu item color changes, you can add custom HTML to the desired Navigation Label directly.
As usual, the quickest and easiest ways to make this adjustment is to use your theme customizer.
To do so, from the WordPress dashboard start by selecting Appearance > Customize.
Depending on the specific theme you have activated, these next steps may vary slightly. That said, most theme customizer menus are intuitive and fairly similar.
In GeneratePress for example, you’ll need to click Colors, followed by Primary Navigation.
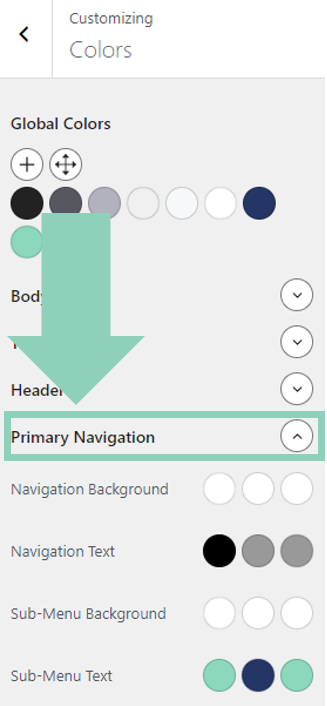
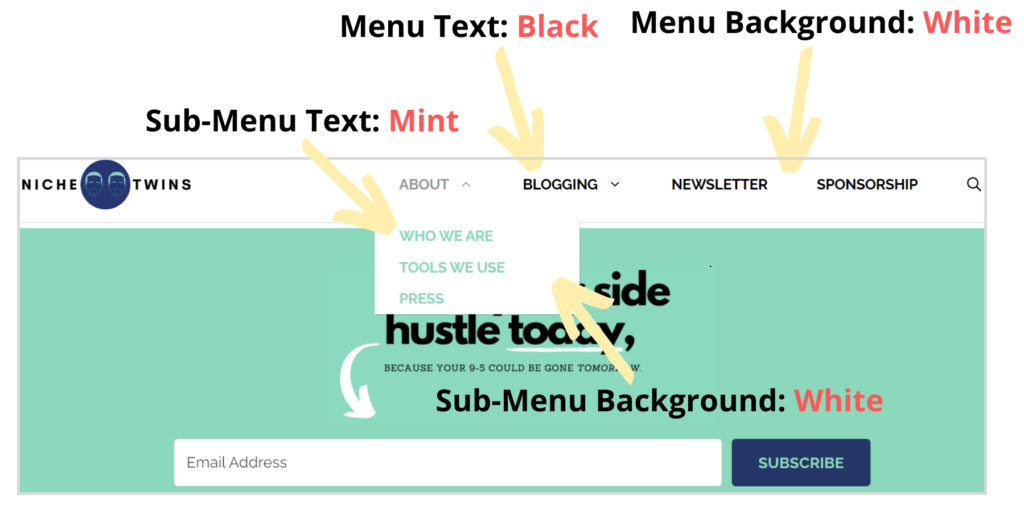
Within the Primary Navigation drop down you will notice four sub-sections labeled Navigation Background, Navigation Text, Sub-Menu Background and Sub-Menu Text.
You will also notice that each element has a total of three different color states you can select from: Initial, Hover and Current.
“Initial” can be thought of as the baseline color. “Hover” on the other hand, is the color the associated menu element will change to once the cursor is hovering over it.
And finally the “current” option gives you the power to change the color for a menu element on a specific page or post. For example, you could make the background color of your primary navigation different for each category page.
This is one of the cool things about the GeneratePress Theme – it gives you maximum control over your menu colors across all four of these elements and all three of these possible states.
Once you click on a color state, you have a few different options when it comes to color selection.
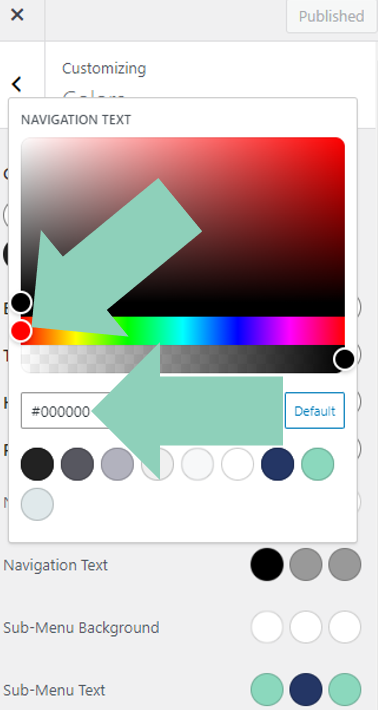
You can select a global site color from the default options listed. You can also use a combination of the color box field and slider. Alternatively, if you know the exact hex value of your desired color, you can enter it directly in the hex field.
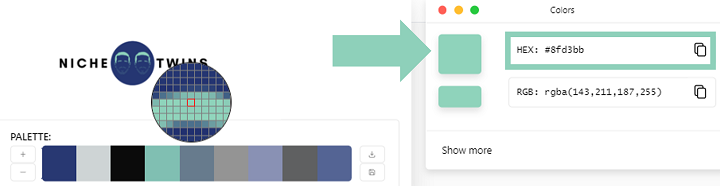
Unsure how to identify the correct hex code? Not a problem.
If you have an image that includes the exact color you wish to use for a menu element, upload the image file to the Image Color Picker website. Then place your mouse over the desired color, and click it. The Hex code will automatically populate.
Pro Tip: Most WordPress themes also give you the ability to change link colors for hyperlinks within a page or post that are not located within the navigational menu.
Notably, the extent to which you can make these adjustments directly within the customizer varies by theme.
Add Custom CSS to ‘Additional CSS’ Field
If the menu color control options within your theme editor are limited, you can always consider deploying some custom CSS instead.
This option requires adding a bit of custom code to the Additional CSS field, which is also located in the theme editor.
To be clear, you do not need to know anything about coding or programming to follow this approach. Instead, you just need to follow a few simple instructions.
First, head over to your web browser and visit your website. On the main page of your site, right click and select Inspect.
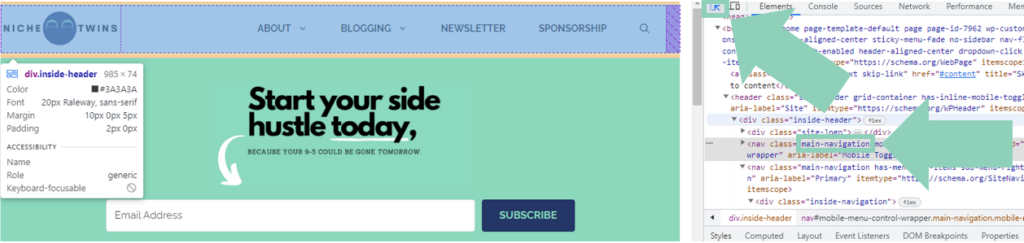
Next, hover your mouse over the main menu area and determine the menu CSS class name within the Inspect code field.
As you can see in the Niche Twins example above, the menu class name is “.main-navigation”.
Finally, depending on the menu element color you wish to change, simply copy and paste the corresponding code below into the Additional CSS field.
Be sure to replace “.main-navigation” with your site’s menu class name and “HEXCODE” with the desired hex value.
/* Main Menu Background. */.main-navigation {
background-color: #HEXCODE;
}/* Main Menu Initial Text. */.main-navigation a {
color: #HEXCODE;
}/* Main Menu Hover Text. */.main-navigation a:hover {
color: #HEXCODE;
}
Click save and clear cache before checking out the update(s) on your live site.
Hoping to change the color of a sub-menu element?
Go back to Inspect and determine the sub-menu class name for your site. In our case, we would replace the “.main-navigation” class with “.sub-menu”, and use the same remaining code above as appropriate.
For instances where you wish to change the color of a single menu item, adding custom HTML directly to the WordPress Navigation Label is your best bet.
Very few people realize that the Navigation Label field is HTML ready (shoutout Kori Ashton at AskKori.com for the tip!) This means you can drop some code straight into the field and it will be deployed on your live site.
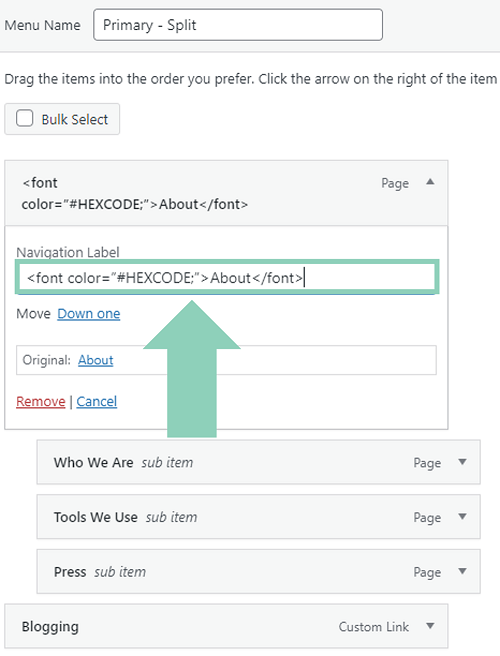
Go to Appearance > Menus and select the menu item you wish to change. In this example I’ll select our ‘About’ menu item.
Next, within the associated Navigation Label, simply add the custom code below depending on the change you wish to make.
- Menu item font color: <font color=”#HEXCODE;”>About</font>
- Menu item background color: <span style=”background-color:#HEXCODE; padding:22px;”>About</span>
Again, be sure to change “About” with the actual menu item you wish to edit and “HEXCODE” with your desired hex value.
Select Save Menu and then clear cache to view the change on your live site.
To further illustrate the point, if we swapped out “HEXCODE” with “FF000” (the hex value for red), only the ‘About’ menu item text would turn red.

Conclusion
Taking the time to change the color of your WordPress menu can make a huge difference when it comes to your site’s look and feel.
First check to see if your theme allows you to make these customizations within the WordPress theme editor. Many themes allow you to adjust the color of the menu background, menu text, sub-menu background and sub-menu text.
If for some reason there is a color change you wish to make that that your theme does not offer, you can always use some custom CSS instead.
And finally, if you wish to change the color of a single menu item, adding custom HTML to the Navigation Label is the best route to take.