The number of WordPress content sites that do not to have a functioning favicon never ceases to amaze me. While seemingly trivial, that little icon displayed in the address bar next to your website name can have a huge impact.
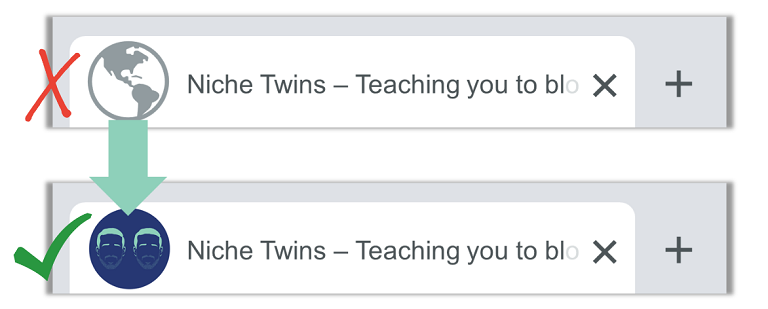
In my opinion, it is a subtle and unappreciated way to build brand awareness and credibility. When you compare a website with Google’s generic globe placeholder or WordPress’ logo placeholder vs a site with a branded favicon, the difference is clear. So when your site icon is not populating, it is in your best interest to get it fixed!

If you’re a WordPress user and discover your favicon not showing, re-upload the image and clear all cache. Also, install the ‘Really Simple SSL’ plugin to prevent HTTPS vs HTTP mixed content errors. If the issue persists, upload the image to your root folder and edit the theme header code.
These four progressive troubleshooting steps will solve the problem for most users. Let’s dive into each step in more detail.
Re-upload Favicon Image In WordPress
Before getting into more involved possible solutions, first try deleting and re-uploading your site icon image.
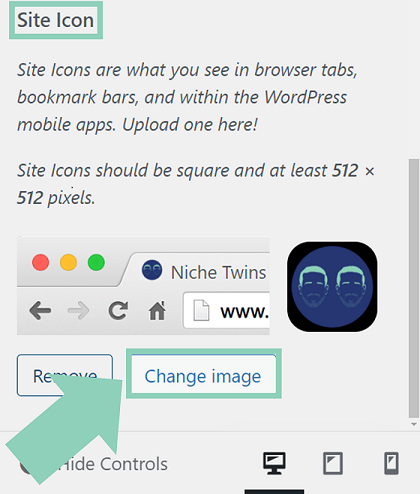
When you re-upload the icon, use a different image file name than the previous version. Also, be sure to pay close attention to the favicon image requirements. The file should be either a JPEG or PNG and the image should be square and at least 512 × 512 pixels.
Once you have your image ready, go to Appearance > Customize and then select Site Identity. From here, scroll down until you reach the Site Icon section and select Change image.

Finally, click the Media Library tab to locate and delete the old version, and then click the Upload files tab to download the new version.
Clear Cache
Once you’ve finished re-uploading your site icon, you may notice it is still not populating on your live site. In the vast majority of cases, this is because the old “cached version” of your site is still being fetched!
To ensure your newly updated site data is fetched instead, you’ll also need to clear the cache.
It is important to understand that caching takes place at the browser, server and CDN level. Typically all three levels need to be cleared in order for your updated site data to start displaying.
For example, ‘NicheTwins’ is currently hosted by Cloudways and we use Cloudflare as our CDN. If I wish to view my new site updates via the Google Chrome browser, it is best practice to first clear cache on Chrome, Cloudways AND Cloudflare.
Even after the cache is cleared it is not uncommon for the updates to take a little while to appear. Be patient! As a potential workaround, you can try using a different browser to view your site in the meantime.
Install ‘Really Simple SSL’ Plugin
So you’ve re-uploaded the desired image and cleared all cache, but still no luck? You may be encountering a “mixed content error”.
In an effort to make the internet a little bit safer, Google has advocated for what are known as SSL certificates. These digital protocols serve as a means to prove a website’s identify and allow for a secure connection. Secure websites with an SSL certificate properly installed are denoted by “HTTPS”, while insecure websites are denoted by “HTTP”.
Sometimes, even if you’ve already installed an SSL certificate, the server will load your page over HTTPS but then request an insecure HTTP site icon file. As a result, a mixed content error is received and your favicon is blocked.
To check if this is the case, visit your site, right click on the screen and select Inspect. Within Inspect, navigate to the Console tab and see if this error is listed.
If the mixed content error is indeed present, you can quickly fix this issue by downloading the Really Simple SSL plugin.
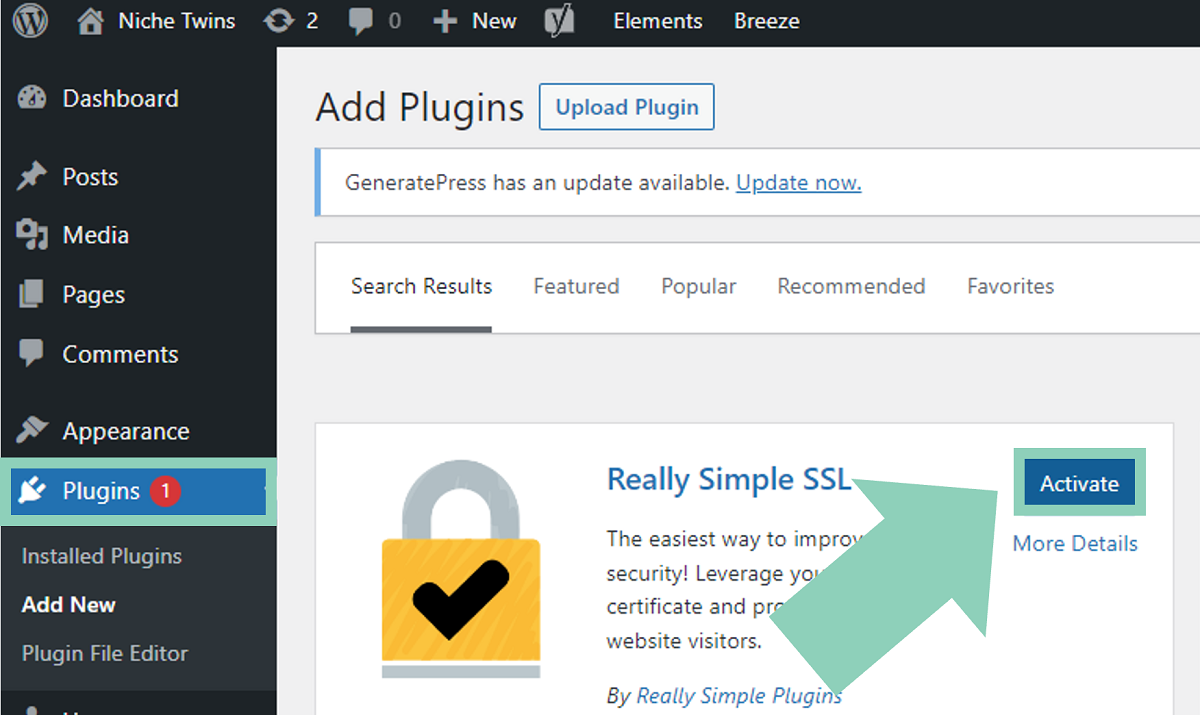
Within your WordPress dashboard go to Plugins > Add New. Then type “Really Simple SSL” into the search field and click Install Now, followed by Activate.

Once activated, go back to the Plugins menu and locate your newly downloaded Really Simple SSL plugin. As a final step, click Settings and then Activate SSL.
Go ahead and clear cache again before refreshing your browser. The issue should now be resolved.
Update Root Folder & Edit Theme Header Code
When all else fails, uploading your favicon file directly to your site’s root folder along with a small addition to your theme header code is the final course of action.
- Start by getting your favicon file into a PNG or JPEG format.
- Then access your website’s cPanel.
- Within the cPanel File Manager, navigate to the root folder of your website and select Upload.
- Once you have uploaded your favicon image, rename the file to “favicon.ico“.
- Now, head back to WordPress and go to Appearance > Theme Editor.
- Select “Theme Header (header.php)” from the menu on the right side of your screen.
- Next, paste the code below at the top of the code field just below “<head>“.
- Finally, be sure to replace “yourwebsiteurl.com” with your specific website and select Update File.
<link rel=”icon” href=”https://yourwebsiteurl.com/favicon.ico” type=”image/x-icon” />
-Omerdee @TechSroat
<link rel=”shortcut icon” href=”https://yourwebsiteurl.com/favicon.ico” type=”image/x-icon” />
Final Word
Your site icon is a small but impactful way for your website to stand out against the competition. So, if for some reason your WordPress favicon is not showing up, take a moment and follow these four troubleshooting steps in order:
- Delete and re-upload the site icon image file
- Clear cache at the browser, server and CDN level
- Install the ‘Really Simple SSL’ plugin to prevent ‘mixed content’ errors
- Edit the theme header code directly
I hope you found this quick troubleshooting guide helpful. If you did, or if you were able to solve the problem some other way, give us a shout in the comments section below!


Thank you for this tutorial. I had tried several different options but item 3, (Update Root Folder & Edit Theme Header Code) did the trick.
Thank you,
Glad we could help Mark!